

60 Essential Linux Commands Day 3 of 90 days Challange
The Linux command is a utility of the Linux operating system. All basic and advanced tasks can be done by executing commands.


To manage a Linux remote machine like a virtual private server (VPS), system administrators commonly use a command-line interface (CLI). While some Linux distributions offer a graphical user interface (GUI), commands are more efficient and flexible with a CLI.
For example, you can replace specific entries in multiple files using a single command, which takes time in a GUI. However, using bash shell can be tricky since Linux has many commands for various tasks.
To help you get started, we will explore 60 essential Linux commands for VPS management. You will also learn tips for using a CLI and leveraging Hostinger’s VPS AI Assistant to easily generate Linux commands.
The 60 Most Commonly Used Linux Commands
This section will explore 60 Linux commands grouped based on their purposes, from modifying files to managing the system network settings.
Pro Tip
To run Linux commands in a remote server, connect via SSH using PuTTY or Terminal. Alternatively, Hostinger VPS hosting users can leverage our built-in Browser terminal to run the commands directly from their web browsers.
Here’s a quick overview:
Command | Function |
ls | Lists a directory’s content |
pwd | Shows the current working directory’s path |
cd | Changes the working directory |
mkdir | Creates a new directory |
rm | Deletes a file |
cp | Copies files and directories, including their content |
mv | Moves or renames files and directories |
touch | Creates a new empty file |
file | Checks a file’s type |
zip and unzip | Creates and extracts a ZIP archive |
tar | Archives files without compression in a TAR format |
nano, vi, and jed | Edits a file with a text editor |
cat | Lists, combines, and writes a file’s content as a standard output |
grep | Searches a string within a file |
sed | Finds, replaces, or deletes patterns in a file |
head | Displays a file’s first ten lines |
tail | Prints a file’s last ten lines |
awk | Finds and manipulates patterns in a file |
sort | Reorders a file’s content |
cut | Sections and prints lines from a file |
diff | Compares two files’ content and their differences |
tee | Prints command outputs in Terminal and a file |
locate | Finds files in a system’s database |
find | Outputs a file or folder’s location |
sudo | Runs a command as a superuser |
su | Runs programs in the current shell as another user |
chmod | Modifies a file’s read, write, and execute permissions |
chown | Changes a file, directory, or symbolic link’s ownership |
useradd and userdel | Creates and removes a user account |
df | Displays the system’s overall disk space usage |
du | Checks a file or directory’s storage consumption |
top | Displays running processes and the system’s resource usage |
htop | Works like top but with an interactive user interface |
ps | Creates a snapshot of all running processes |
uname | Prints information about your machine’s kernel, name, and hardware |
hostname | Shows your system’s hostname |
time | Calculates commands’ execution time |
systemctl | Manages system services |
watch | Runs another command continuously |
jobs | Displays a shell’s running processes with their statuses |
kill | Terminates a running process |
shutdown | Turns off or restarts the system |
ping | Checks the system’s network connectivity |
wget | Downloads files from a URL |
curl | Transmits data between servers using URLs |
scp | Securely copies files or directories to another system |
rsync | Synchronizes content between directories or machines |
lfconfig | Displays the system’s network interfaces and their configurations |
netstat | Shows the system’s network information, like routing and sockets |
traceroute | Tracks a packet’s hops to its destination |
nslookup | Queries a domain’s IP address and vice versa |
dig | Displays DNS information, including record types |
history | Lists previously run commands |
man | Shows a command’s manual |
echo | Prints a message as a standard output |
ln | Links files or directories |
alias and unalias | Sets and removes an alias for a file or command |
cal | Displays a calendar in Terminal |
apt-get | Manages Debian-based distros package libraries |
Linux Commands for File and Directory Management
This section will explore basic Linux commands for file and directory management.
1. ls command
The ls command lists files and directories in your system. Here’s the syntax:
ls [/directory/folder/path]

If you remove the path, the ls command will show the current working directory’s content. You can modify the command using these options:
-R – lists all the files in the subdirectories.
-a – shows all files, including hidden ones.
-lh – converts sizes to readable formats, such as MB, GB, and TB.
2. pwd command
The pwd command prints your current working directory’s path, like /home/directory/path. Here’s the command syntax:
pwd [option]
It supports two options. The -L or –-logical option prints environment variable content, including symbolic links. Meanwhile, -P or –physical outputs the current directory’s actual path.

3. cd command
Use the cd command to navigate the Linux files and directories. To use it, run this syntax with sudo privileges:
cd /directory/folder/path

Depending on your current location, it requires either the full path or the directory name. For example, omit /username from /username/directory/folder if you are already within it.
Omitting the arguments will take you to the home folder. Here are some navigation shortcuts:
cd ~[username] – goes to another user’s home directory.
cd .. – moves one directory up.
cd- – switches to the previous directory.
4. mkdir command
Use the mkdir command to create one or multiple directories and set their permissions. Ensure you are authorized to make a new folder in the parent directory. Here’s the basic syntax:
mkdir [option] [directory_name]
To create a folder within a directory, use the path as the command parameter. For example, mkdir music/songs will create a songs folder inside music. Here are several common mkdir command options:
-p – creates a directory between two existing folders. For example, mkdir -p Music/2024/Songs creates a new 2024 directory.
-m – sets the folder permissions. For instance, enter mkdir -m777 directory to create a directory with read, write, and execute permissions for all users.
-v – prints a message for each created directory.

5. rmdir command
Use the rmdir command to delete an empty directory in Linux. The user must have sudo privileges in the parent directory. Here’s the syntax:
rmdir [option] directory_name
If the folder contains a subdirectory, the command will return an error. To force delete a non-empty directory, use the -p option.
6. rm command
Use the rm command to permanently delete files within a directory. Here’s the general syntax:
rm [filename1] [filename2] [filename3]
Adjust the number of files in the command according to your needs. If you encounter an error, ensure you have the write permission in the directory.
To modify the command, add the following options:
-i – prompts a confirmation before deletion.
-f – allows file removal without a confirmation.
-r – deletes files and directories recursively.
Warning! Use the rm command with caution since deletion is irreversible. Avoid using the -r and -f options since they may wipe all your files. Always add the -i option to avoid accidental deletion.
7. cp command
Use the cp command to copy files or directories, including their content, from your current location to another. It has various use cases, such as:
- Copying one file from the current directory to another folder. Specify the file name and target path:
cp filename.txt /home/username/Documents
- Duplicating multiple files to a directory. Enter the file names and the destination path:
cp filename1.txt filename2.txt filename3.txt /home/username/Documents
- Copying a file’s content to another within the same directory. Enter the source and the destination file:
cp filename1.txt filename2.txt
- Duplicating an entire directory. Pass the -R flag followed by the source and destination directory:
cp -R /home/username/Documents /home/username/Documents_backup
8. mv command
Use the mv command to move or rename files and directories. To move items, enter the file name followed by the destination directory:
mv filename.txt /home/username/Documents
Meanwhile, use the following syntax to rename a file in Linux with the mv command:
mv old_filename.txt new_filename.txt
9. touch command
The touch command lets you create an empty file in a specific directory path. Here’s the syntax:
touch [option] /home/directory/path/file.txt
If you omit the path, the command will create the item in the current folder. You can also use touch to generate and modify a timestamp in the Linux command line.
10. file command
The file command lets you check a file type – whether it is a text, image, or binary. Here’s the syntax:
file filename.txt
To bulk-check multiple files, list them individually or use their path if they are in the same directory. Add the -k option to display more detailed information and -i to show the file’s MIME type.
11. zip, unzip commands
The zip command lets you compress items into a ZIP file with the optimal compression ratio. Here’s the syntax:
zip [options] zipfile file1 file2….
For example, this command compresses note.txt into archive.zip in the current working directory:
zip archive.zip note.txt
Use the unzip command to extract the compressed file. Here’s the syntax:
unzip [option] file_name.zip
12. tar command
The tar command archives multiple items into a TAR file – a format similar to ZIP with optional compression. Here’s the syntax:
tar [options] [archive_file] [target file or directory]
For instance, enter the following to create a new newarchive.tar archive in the /home/user/Documents directory:
tar -cvzf newarchive.tar /home/user/Documents
Linux Commands for Text Processing and Searching
The following section explores several Linux commands for processing and searching text.
13. nano, vi, jed commands
Linux lets users edit files using a text editor like nano, vi, or jed. While most distributions include nano and vi, users must install jed manually. All these tools have the same command syntax:
nano filename
vi filename
jed filename
If the target file doesn’t exist, these editors will create one. We recommend nano if you want to quickly edit text files. Meanwhile, use vi or jed for scripting and programming.
14. cat command
Concatenate or cat is one of the most used Linux commands. It lists, combines, and writes file content to the standard output. Here’s the syntax:
cat filename.txt
There are various ways to use the cat command:
cat > filen.txt – creates a new file.
cat file1.txt file2.txt > file3.txt – merges file1.txt with file2.txt and stores the output in filename3.txt.
tac file.txt – displays content in reverse order.
15. grep command
The global regular expression or grep command lets you find a word by searching the content of a file. This Linux command prints all lines containing the matching strings, which is useful for filtering large log files.
For example, to display lines containing blue in the notepad.txt file, enter:
grep blue notepad.txt
16. sed command
The sed command lets you find, replace, and delete patterns in a file without using a text editor. Here’s the general syntax:
sed [option] 'script' input_file
The script contains the searched regular expression pattern, the replacement string, and subcommands. Use the s subcommand to replace matching patterns or d to delete them.
At the end, specify the file containing the pattern to modify. Here’s an example of a command that replaces red in colors.txt and hue.txt with blue:
sed 's/red/blue' colors.txt hue.txt
17. head command
The head command prints the first ten lines of a text file or piped data in your command-line interface. Here’s the general syntax:
head [option] [file]
For instance, to view the first ten lines of note.txt in the current directory, enter:
head note.txt
The head command accepts several options, such as:
-n – changes the number of lines printed. For example, head -n 5 shows the first five lines.
-c – prints the file’s first customized number of bytes.
-q – disables headers specifying the file name.

18. tail command
The tail command displays the last ten lines of a file, which is useful for checking new data and errors. Here’s the syntax:
tail [option] [file]
For example, enter the following to show the last ten lines of the colors.txt file:
tail -n colors.txt
19. awk command
The awk command scans regular expression patterns in a file to retrieve or manipulate matching data. Here’s the basic syntax:
awk '/regex pattern/{action}' input_file.txt
The action can be mathematical operations, conditional statements like if, output expressions such as print, and a delete command. It also contains the $n notation, which refers to a field in the current line.
To add multiple actions, list them based on the execution order, separated using semicolons. For example, this command contains mathematical, conditional, and output statements:
awk -F':' '{ total += $2; students[$1] = $2 } END { average = total / length(students); print "Average:", average; print "Above average:"; for (student in students) if (students[student] > average) print student }' score.txt

20. sort command
The sort command rearranges lines in a file in a specific order. It doesn’t modify the actual file and only prints the result as Terminal outputs. Here’s the syntax:
sort [option] [file]
By default, this command will sort the lines in alphabetical order, from A to Z. To modify the sorting, use these options:
-o – redirects the command outputs to another file.
-r – reverses the sorting order to descending.
-n – sorts the file numerically.
-k – reorders data in a specific field.

21. cut command
The cut command retrieves sections from a file and prints the result as Terminal outputs. Here’s the syntax:
cut [option] [file]
Instead of a file, you can use data from standard input. To determine how the command sections the line, use the following options:
-f – selects a specific field.
-b – cuts the line by a specified byte size.
-c – sections the line using a specified character.
-d – separates lines based on delimiters.
You can combine these options, use a range, and specify multiple values. For example, this command extracts the third to fifth field from a comma-separated list:
cut -d',' -f3-5 list.txt

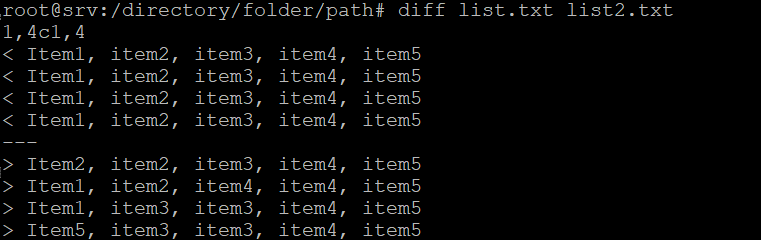
22. diff command
The diff command compares two files’ content and outputs the differences. It is used to alter a program without modifying the code. Here’s the general format:
diff [option] file1 file2
Below are some acceptable options:
-c – displays the difference between two files in a context form.
-u – shows the output without redundant information.
-i – makes the diff command case insensitive.
23. tee command
The tee command writes the user’s input to Terminal’s output and files. Here’s the basic syntax:
command | tee [option] file1
For example, the following pings Google and prints the output in Terminal, ping_result.txt, and the 19092024.txt file:
ping google.com | tee ping_result.txt 19092024.txt
24. locate command
The locate command lets you find a file in the database system. Add the -i option to turn off case sensitivity and an asterisk (*) to find content with multiple keywords. For example:
locate -i school*note
The command searches for files containing school and note, regardless of their letter case.
25. find command
Use the find command to search for files within a specific directory. Here’s the syntax:
find [option] [path] [expression]
For example, to find a file called file1.txt within the directory folder and its subdirectories, use this command:
find /home -name file1.txt

If you omit the path, the command will search the current working directory. You can also find directories using the following:
find ./ -type d -name directoryname
Linux Commands for User and Permission Management
Below are several Linux commands for managing the system’s users and permissions.
26. sudo command
Superuser do or sudo is one of the most basic commands in Linux. It runs your command with administrative or root permissions. Here’s the general syntax:
sudo (command)
When you run a sudo command, Terminal will request the root password. For example, this snippet runs useradd with the superuser privilege:
sudo useradd username
You can also add an option, such as:
-k – invalidates the timestamp file.
-g – executes commands as a specified group name or ID.
-h – runs commands on the host.
Warning! Running a command with sudo privileges can modify all aspects of your system. Since misusing it may break your system, run the command with caution and only if you understand its possible repercussions.
27. su command
The su command lets you run a program in the Linux shell as a different user. It is useful to connect via SSH while the root user is disabled. Here’s the syntax:
su [options] [username [argument]]
Without any option or argument, this command runs through root and prompts you to use the sudo privileges temporarily. Some options are:
-p – keeps the same shell environment, consisting of HOME, SHELL, USER, and LOGNAME.
-s – lets you specify another shell environment to run.
-l – runs a login script to switch users. It requires you to enter the user’s password.
To check the current shell’s user account, run the whoami command:

28. chmod command
The chmod command modifies directory or file permissions in Linux. Here’s the basic syntax:
chmod [option] [permission] [file_name]
In Linux, each file is associated with three user classes – owner, group member, and others. It also has three permissions – read, write, and execute. If an owner wants to grant all permissions to every user, the command looks like this:
chmod -rwxrwxrwx note.txt
29. chown command
The chown command lets you change a file, directory, or symbolic link’s ownership to the specified username. Here’s the syntax:
chown [option] owner[:group] file(s)
For example, to make linuxuser2 the owner of filename.txt, use:
chown linuxuser2 filename.txt
30. useradd, userdel commands
Use useradd to create a new Linux user account and change its password with the passwd command. Here are the syntaxes:
useradd [option] username
passwd username
Both the useradd and passwd commands require sudo privileges. To delete a user, use the userdel command:
userdel username
Linux Commands for System Information and Management
This section will list common Linux commands for querying system information and management.
31. df command
Use the df command to check a Linux system’s disk space usage in percentage and kilobyte (KB). Here’s the syntax:
df [options] [file]
If you don’t specify the item, this command will display information about every mounted file system. These are some acceptable options:
-m – displays information on the file system usage in MBs.
-k – prints file system usage in KBs.
-T – shows the file system type in a new column.
32. du command
Use du to check a file or directory’s storage consumption. Remember to specify the directory path when using this command, for example:
du /home/user/Documents
The du command has several options, such as:
-s – shows the specified folder’s total size.
-m – provides folder and file information in MB.
-k – displays information in KB.
-h – informs the displayed folders and files’ last modification date.
33. top command
The top command displays running processes and the system’s real-time condition, including resource utilization. It helps identify resource-intensive processes, enabling you to disable them easily.
To run the command, enter top into your command-line interface.
34. htop command
The htop command is an interactive program for monitoring system resources and server processes. Unlike top, it offers additional features like mouse operation and visual indicators. Here’s the command syntax:
htop [options]
It supports options such as:
-d – shows the delay between updates in tenths of seconds.
-C – enables monochrome mode.
-h – displays the help message and exits.
35. ps command
The ps command creates a snapshot of all running processes in your system. Executing it without an option or argument will list the running processes in the shell with the following information:
Unique process ID (PID).
Type of the terminal (TTY).
Running time (TIME).
Command that launches the process (CMD).
The ps command accepts several options, including:
-T – displays all processes associated with the current shell session.
-u username – lists processes associated with a specific user.
-A – shows all the running processes.
Suggested Reading
Learn more about using top, htop, and ps commands to check running processes in a Linux system.
36. uname command
The uname or unix name command prints information about your machine, including its hardware, system name, and Linux kernel. Here’s the basic syntax:
uname [option]
While you can use it without an option, add the following to modify the command:
-a – prints all the system information.
-s – outputs the kernel name.
-n – shows the system’s node hostname.

37. hostname command
Run the hostname command to display the system’s hostname. Here’s the syntax:
hostname [option]
You can run it without an option or use the following:
-a – displays the hostname’s alias.
-A – shows the machine’s Fully Qualified Domain Name (FQDN).
-i – outputs the machine’s IP address.

38. time command
Use time to measure commands’ execution time. Here’s the syntax:
time [commandname]
To measure a series of commands, separate them using semicolons or double ampersands (&&). For example, we will measure cd, touch, and chmod commands’ overall execution time:
time cd /home/directory/path; touch bashscript.sh; chmod +x bashscript.sh
39. systemctl command
The systemctl command lets you manage installed services in your Linux system. Here’s the basic syntax:
systemctl [commandname] [service_name]
To use the command, the user must have root privilege. It has several use cases, including starting, restarting, and terminating a service. You can also check a service’s status and dependencies.
The systemctl command is only available in Linux distributions with the Systemd init system. Check our article on listing and managing Linux services to learn more about other systems’ commands.
40. watch command
The watch command lets the user continuously run another utility at a specific interval and print the results as a standard output. Here’s the syntax:
watch [option] command
It is useful for monitoring command output changes. To modify its behavior, use the following options:
-d – displays the differences between command executions.
-n – changes the default two-second interval.
-t – disables the header containing the time interval, command, timestamp, and hostname.
41. jobs command
The jobs command displays a shell’s running processes with their statuses. It is only available in csh, bash, tcsh, and ksh shells. Here’s the basic syntax:
jobs [options] jobID
To check the status of jobs in the current shell, enter jobs without any arguments in Terminal. The command will return an empty output if your system doesn’t have running jobs. You can also add the following options:
-l – lists process IDs and their information.
-n – shows jobs whose statuses have changed since the last notification.
-p – displays process IDs only.
42. kill command
Use the kill command to terminate an unresponsive program using its identification number (PID). To check the PID, run the following command:
ps ux
To stop the program, enter the syntax below:
kill [signal_option] pid
There are 64 signals for terminating a program, but SIGTERM and SIGKILL are the most common. SIGTERM is the default signal that lets the program save its progress before stopping. Meanwhile, SIGKILL forces programs to stop and discard unsaved progress.
43. shutdown command
The Linux shutdown command lets you turn off or restart your system at a specific time. Here’s the syntax:
shutdown [option] [time] "message"
You can use an absolute time in a 24-hour format or a relative one like +5 to schedule it in five minutes. The message is a notification sent to logged-in users about the system shutdown.
Instead of shutting down, restart the system using the -r option. To cancel a scheduled reboot, run the command with the -c option.
Linux Commands for Network Management and Troubleshooting
Here are commonly used Linux commands for managing and troubleshooting network connections.
44. ping command
The ping command is one of the most used commands in Linux. It lets you check whether a network or server is reachable, which is useful for troubleshooting connectivity issues. Here’s the syntax:
ping [option] [hostname_or_IP_address]
For example, run the following to check the connection and response time to Google:
ping google.com
45. wget command
Use the wget command to download files from the internet using HTTP, HTTPS, or FTP protocols. Here’s the syntax:
wget [option] [url]
For example, enter the following to download the latest version of WordPress:
wget https://wordpress.org/latest.zip
46. curl command
The curl command transfers data between servers. Its common usage is for retrieving a web page’s content to your system using its URL. Here’s the syntax:
curl [option] URL
However, you can add various options to modify the curl command behavior for other tasks. Some of the most popular ones include:
-o or -O – downloads files from a URL.
-X – changes the default HTTP GET method.
-H – sends a custom header to the URL.
-F – uploads a file to the specified destination.
47. scp command
The scp command securely copies files or directories between systems over a network. Here’s the syntax:
scp [option] [source username@IP]:/[directory and file name] [destination username@IP]:/[destination directory]
For a local machine, omit the hostname and IP address. Use the following options to modify the copying behavior:
-P – changes the port for copying. The default is 22.
-l – limits the scp command’s bandwidth.
-C – compresses transferred data to make it smaller.
48. rsync command
The rsync command lets you sync files or folders between two destinations to ensure they have the same content. Here’s the syntax:
rsync [options] source destination
If your destination or source is a folder, enter the directory path like /home/directory/path. To sync a remote server, use its hostname and IP address, like host@185.185.185.185.
This command has various options:
-a – enables archive mode to preserve file permissions, dates, and other attributes.
-v – shows visual information about the transferred file.
-z – compresses the transferred file data to reduce their size.
49. ifconfig command
The ifconfig command lets you list and configure your system’s network interface. In newer Linux distros, it is equivalent to the ip command. Here’s the basic syntax:
ifconfig [interface] [option]
Running it without arguments displays information about all network interfaces in your system. To check a specific interface, add its name as an argument without an option. For a more specific task, use the following options:
–s – summarizes the network interfaces and their configuration. This option goes before the interface name.
up and down – enables and disables a network interface.
inet and inet6 – assigns an IPv4 and IPv6 address to a network interface.
netmask – specifies the subnet mask to use with an IPv4 address.

50. netstat command
The netstat command is used to display your system’s network information, like sockets and routing. Here’s the command syntax:
netstat [option]
Use various options to modify the displayed information. Some common ones are:
-a – displays listening and closed sockets.
-t – shows TCP connections.
-u – lists UDP connections.
-r – displays routing tables.
-i – shows information about network interfaces.
-p – lists programs’ names and process IDs.
-c – continuously outputs network information for real-time monitoring.

51. traceroute command
The traceroute command tracks a packet’s path when it moves to another host over a network. It gives you information about the involved routers and travel time. Here’s the syntax:
traceroute [option] destination
You can use a domain, hostname, or IP address as the destination. Add the following options for more detailed packet monitoring:
-m – sets each packet’s maximum hops.
-n – prevents the command from resolving IP addresses to hostnames for quicker tracing.
-I – changes the default UDP packets to UCMP.
-w – adds a timeout in seconds.

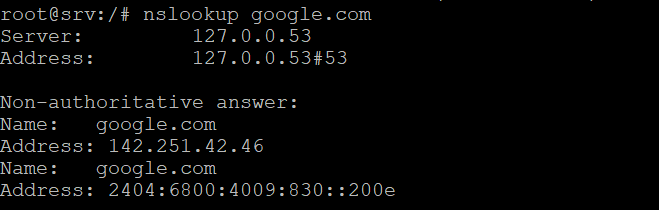
52. nslookup command
The nslookup command queries a DNS server to find out the domain associated with an IP address and vice versa. Here’s the syntax:
nslookup [options] domain-or-ip [server]
If you don’t specify the DNS server to use, nslookup will use the default resolver from your system or internet service provider. This command supports various options, with some commonly used ones being:
-type= – queries specific information, like the IP address type or MX record.
-port= – sets the DNS server’s port number for the query.
-retry= – repeats the query a specific number of times upon failure.
-debug – enables the debug mode to provide more information about the query.
53. dig command
The dig or domain information groper command gathers DNS data from a domain. Unlike nslookup, it is more detailed and versatile. Here’s the syntax:
dig [option] target [query_type]
Replace target with a domain name. By default, this command only shows A record type. Change query_type to check a specific type or use ANY to query all of them. To run a reverse DNS lookup, add the -x option and use the IP address as the target.
Miscellaneous Linux Commands
In this section, we will list Linux commands with various functions.
54. history command
Enter history to list previously executed commands. It lets you reuse the commands without rewriting them. To use it, enter this syntax with sudo privileges:
history [option]

To rerun a specific utility, enter an exclamation mark (!) followed by the command’s list number. For example, use the following to rerun the 255th command:
!255
This command supports many options, such as:
-c – clears the history list.
-d offset – deletes the history entry at the OFFSET position.
-a – appends history lines.
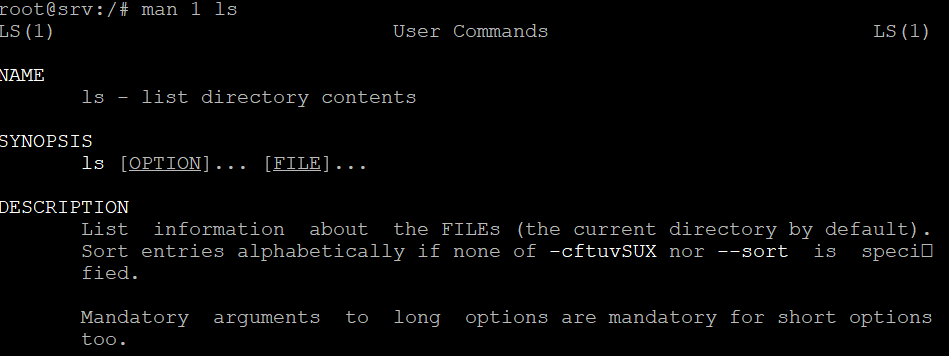
55. man command
The man command provides a user manual of any Linux Terminal utilities, including their names, descriptions, and options. It consists of nine sections:
Executable programs or shell commands
System calls
Library calls
Games
Special files
File formats and conventions
System administration commands
Kernel routines
Miscellaneous
Here’s the command syntax:
man [option] [section_number] command_name
If you only use the command name as the parameter, Terminal displays the full user manual. Here’s an example command to query section 1 of the ls command manual:
man 1 ls
56. echo command
The echo command displays a line of text as a standard output. Here’s the basic command syntax:
echo [option] [string]
For example, you can display Hostinger Tutorials by entering:
echo "Hostinger Tutorials"

This command supports many options, such as:
-n – displays the output without the trailing newline.
-e – enables the interpretation of the following backslash escapes:
\b – removes spaces in between a text.
\c – produces no further output.
57. ln command
The ln command lets you create links between files or directories to simplify system management. Here’s the syntax:
ln [option] [source] [destination]
The command will create the target file or directory and link it to the source. By default, it creates a hard link, meaning the new item connects to the same data block as the source.
58. alias, unalias commands
The alias command instructs the shell to replace a string with another, allowing you to create a shortcut for a program, file name, or text. Here’s the syntax:
alias name=string
For example, enter the following to make k the alias for the kill command:
alias k='kill'
This command doesn’t give any output. To check the alias associated with a command, run the following:
alias command_name
To delete an existing alias, use the unalias command with the following syntax:
unalias [alias_name]
59. cal command
The cal command outputs a calendar in the Linux Terminal. It will show the current date if you don’t specify the month and year. Here’s the syntax:
cal [option] [month] [year]

The month is in the numerical representation from 1–12. To modify the command output, add the following options:
-1 – outputs the calendar in a single line.
-3 – shows the previous, current, and next month.
-A and -B – displays the specified number of months after and before the current one.
-m – starts the calendar with Monday instead of Sunday.
60. apt-get command
apt-get is a command line tool for handling Advanced Package Tool (APT) libraries in Debian-based Linux, like Ubuntu. It requires sudo or root privileges.
This Linux command lets you manage, update, remove, and install software, including its dependencies. Here’s the main syntax:
apt-get [options] (command)
These are the most common commands to use with apt-get:
update – synchronizes the package files from their sources.
upgrade – installs the latest version of all installed packages.
check – updates the package cache and checks broken dependencies.

Linux Commands Tips and Tricks
Here are some tips for using Linux commands and Terminal to improve your system management efficiency:
Add the –help option to list the full usage of a command.
Use the exit command to close Terminal.
Enter the clear command to clean the Terminal screen.
Press the Tab button to autofill after entering a command with an argument.
Use Ctrl + C to terminate a running command.
Press Ctrl + Z to pause a working command.
Use Ctrl + A to move to the beginning of the line.
Press Ctrl + E to bring you to the end of the line.
Separate multiple commands using semicolons (;) or double ampersands (&&).
🎉🌐 Let's connect @ Md Meherab Hossen